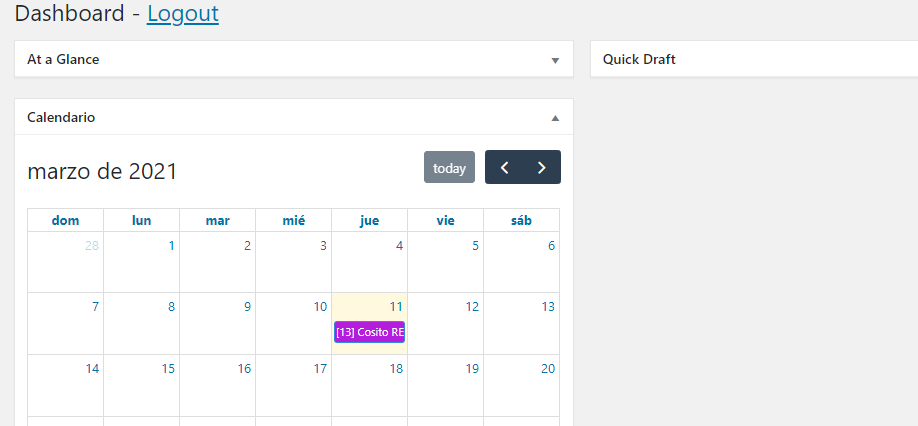
Here's perhaps a little hacky way to achieve a full width dashboard widget. Here we force the first (left-most) column to be 100% and to contain our custom widget.
Step 1
WP stores the Dashboard widget visibility and order as user specific option. To get the below code working we need to prevent the user's preference from overriding our setup by filtering the related option.
// Prevent users from putting anything to first column
// as widget order set by user overrides everything
add_filter(
    'get_user_option_meta-box-order_dashboard',
    function($result, $option, $user) {
        // Force custom widget to 1st column
        if ( ! empty( $result['normal'] ) ) {
            $result['normal'] = array('dashboard_widget_example');
        }
        return $result;
    },
    10,
    3
);
Step 2
Add little styling to change the column widths.
// Style dashboard widget columns
add_action(
    'admin_head',
    function() {
        echo "<style type='text/css'>
            #dashboard-widgets .postbox-container {width: 33.333333%;}
            #dashboard-widgets #postbox-container-1 {width: 100%;}
        </style>";
    }
);
Step 3
Finally we force all the other widgets from the first column to the second one, and register our custom dashboard widget to populate the first column.
// Dashboard widget reordering
add_action( 'wp_dashboard_setup', function(){

  global $wp_meta_boxes;

    // Move all dashboard wigets from 1st to 2nd column
    if ( ! empty( $wp_meta_boxes['dashboard']['normal'] ) ) {
        if ( isset($wp_meta_boxes['dashboard']['side']) ) {
            $wp_meta_boxes['dashboard']['side'] = array_merge_recursive(
                $wp_meta_boxes['dashboard']['side'],
                $wp_meta_boxes['dashboard']['normal']
            );
        } else {
            $wp_meta_boxes['dashboard']['side'] = $wp_meta_boxes['dashboard']['normal'];
        }
        unset( $wp_meta_boxes['dashboard']['normal'] );
    }

  // Add custom dashbboard widget.
  add_meta_box( 'dashboard_widget_example',
    __( 'Example Widget', 'example-text-domain' ),
    'render_example_widget',
    'dashboard',
    'normal',
    'default'
  );

} );

function render_example_widget() {
?>
  <p>Do something.</p>
<?php
}

